Sunday, September 15, 2013

Santa Chimney Place Setting

Santa Chimney Place Setting

For this project I used Sno-Tex snow texture paint, Chalkboard paint, and Patio Paint. Man I love this Patio Paint! Have you ever used this? This was my first time and the coverage on this pot is amazing. I’ve painted a LOT of clay pots in my time and after this will never use regular acrylic paint again. Ev-er.
Santa Chimney Place SettingFirst you’ll paint the clay pot. To make the bricks, just use a small rectangle cut from a household sponge. Then put a layer of Snotex around the rim.
Santa Chimney Place SettingTo make the legs you’ll twist chenille together to make it a fatter piece, then twist them around a pencil or paint brush to coil them.
Santa Chimney Place SettingHis body is made from a Styrofoam egg. Paint glue on the fat end and cover in glitter. Put a toothpick into the narrow end, this helps it stand up in the pot. The legs go in the ‘red’ end, using a toothpick to create holes in the egg helps a lot. The shoes are made from a small egg cut in half and glittered in black. I actually didn’t have a small egg, so I used half of a ball, cut that in half, then shaped them. The egg would be easier, hence me suggesting it to you ;-)
Santa Chimney Place SettingThe full instructions are below, hope you have fun!
Santa Chimney Place Setting
 
Ingredients
  • Supplies:
  • 1 small terra cotta pot
  • Patio Paint: cream and reddish-brown
  • Black chalkboard paint
  • SnoTex snow texture paint
  • 1 medium Styrofoam egg
  • 1 small Styrofoam egg
  • 2 glittery red chenille stems
  • 1 white chenille stem
  • 10 small glittery white pom poms
  • Fine glitter: red and black
  • 2 toothpicks
  • 1 small wood rectangle (cardboard will work too!)
  • You’ll also need:
  • household sponge
  • paintbrush
  • white craft glue
  • hot glue gun
  • white chalkboard pen
  • cotton balls
Instructions
  1. First, paint your terra cotta pot with cream paint. Allow it to dry, then use a small rectangular piece cut from a household sponge to add the reddish-brown bricks. Let dry.
  2. Apply snow texture paint to the rim of the pot using a palette or a paintbrush. Set aside to dry.
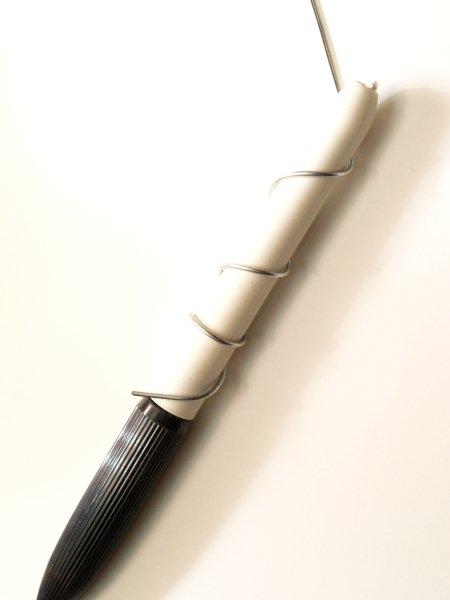
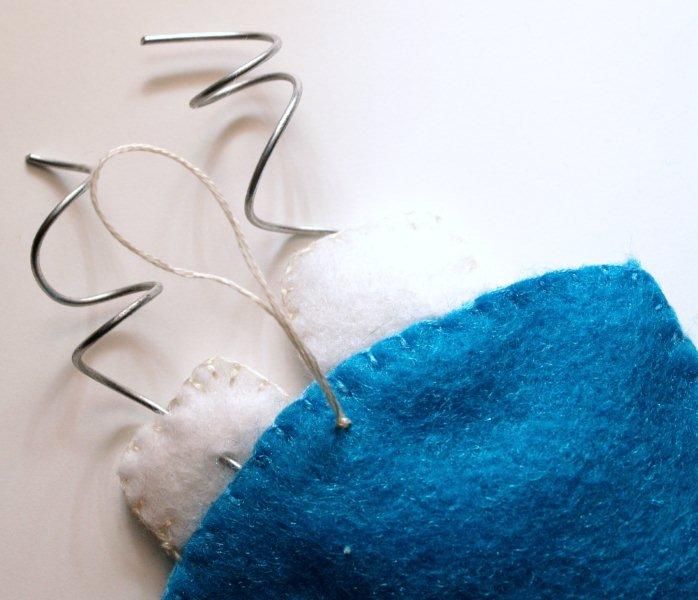
  3. Fold a red chenille stem in half and cut to create two equal pieces. Twist the two pieces together to form one thicker piece. Repeat with second chenille stem. Now coil each of them around a pencil or pen, slide off.
  4. Cut the small Styrofoam egg in half lengthwise, these are Santa’s boots. Insert a coiled chenille stem into the round half of one of the egg pieces. Repeat with other chenille stem. Coat the “boots” with white glue and sprinkle with black glitter. Tap off excess and set aside to dry.
  5. Insert a toothpick into the smaller end of the large Styrofoam egg. Paint the larger end with white glue. Sprinkle red glitter all over the glue and tap off excess. Set aside to dry (hint: if you have floral foam stick the toothpick into the foam. If not, simply use a cardboard egg carton).
  6. While the painted pot and the glitter eggs are drying, paint the wood rectangle with black chalkboard paint. Hot glue the second toothpick to the back of the “sign”. Use chalkboard pen to write your guest’s name on the sign. Add some snow texture paint to the top of the sign. Allow everything to dry.
  7. Place 2-3 cotton balls inside the clay pot. With toothpick pointing down, insert the large red glitter egg into the pot. Pull additional cotton balls into pieces and tuck them into the pot around the glitter egg to help support it.
  8. Cut white chenille stem in half. Carefully twist around Santa’s legs to create pant cuffs. Secure with glue. Insert the chenille legs into the red glitter egg (Santa’s bottom) and secure with white glue. You can create small holes in the egg first by poking a pencil into it, then inserting the chenille.
  9. Hot glue the white glitter pom poms in a circle around the red glitter egg to create the bottom of Santa’s coat.
  10. Insert the personalized sign into the terra cotta pot and secure with glue.

Santa Chimney

I found this at www.craftsbyamanda.com
 

Halloween ice cream sandwich spiders

I wanted to make a fun dessert for Halloween, so here are my easy Halloween ice cream sandwich spiders!
SUPPLIES:
  • Chocolate chip cookies
  • Candy eyes
  • Orange M&Ms
  • Cookie icing or royal icing
  • Black licorice shoelaces cut into 7 inch strands
  • Chocolate sprinkles
  • Ice cream
halloween-spider-ice-cream-sandwich-1A

Using cookie icing as glue, attach two candy eyes and orange M&Ms to the top of a cookie. I like to put the cookie icing on the eye or M&M and then affix to the cookie.
halloween-spider-ice-cream-sandwich-6A
Here's my finished spider top. You might need to wait 5-10 minutes for the cookie icing to set.
On a bottom cookie, add a scoop of ice cream. Cover the sides of the ice cream with sprinkles.
Drape four  black licorice shoe laces over the top of the ice cream scoop.
halloween-spider-ice-cream-sandwich-14A
Attach your head and... voila!
halloween-spider-ice-cream-sandwich-49A

Trick: I put the bottom cookies in the fridge to keep them cold so I could work with the ice cream and it wouldn't melt right away.
halloween-spider-ice-cream-sandwich-59A

Candy Corn Scarecrow


Candy Corn is fun fall treat.  I love the each of the white, orange and yellow layers. When it is packaged as a cute candy corn Scarecrow who can resist it!

To make these adorable candy corn scarecrows you will need:

  • An empty glass bottle.  I reused a Starbucks frappuccino bottle.
  • Plastic cup
  • Yellow sharpie
  • Buttons
  • Candy Corn
  • Brown and orange paper scraps

Color your plastic cup with a yellow sharpie.  You could also use a yellow paper cup.  However, I like how the plastic curls and it was what I had on hand.  Trim your cup to the correct size, and cut slits to mimic straw.  Gently curl the edges.  Add a paper band to the hat as a finishing touch.  You could also embellish with flowers if you were making a girl scarecrow.

Glue on button eyes and a paper stitched mouth.  Fill your jar with Candy Corn and your little candy corn Scarecrow is all finished.
These little Scarecrows would make a great teacher gift or favors for your next party.  I was able to use recycled materials and make what I had on hand work.  ll I needed to purchase was the candy.  I love cute project that don’t cost anything to make!

I found this one.... let's have fun with it.

Tuesday, September 10, 2013

Halloween Garland

homemade halloween decorations

Materials for Homemade Halloween Decorations: Halloween Garland

homemade halloween decorations
What You Will Need
Felt: orange, green, black, white, pink, yellow Embroidery thread: orange, green, black, white, pink, yellow Buttons: 5 white, 2 green (About ½” with 4 holes) Jute or String (About 48”) Raffia Needle Scissors
Note: The finished garland is about 36” long. If you want your finished garland to be longer, just add a few more ghosts or pumpkins.

Instructions for Homemade Halloween Decorations: Halloween Garland

homemade halloween decorations
Step 1:
Print out the Halloween garland template. Trace and cut out 2 ghosts from white felt. Stitch around the border of the ghosts with black thread, using the running stitch. The stitches should be about 1/8” in from the edge. See photo A. Now cut out the eyes for the ghosts from black felt. Stitch them on with black thread using the running stitch around the edge. To make the mouth for the ghosts you will also use black thread. Start by drawing a light pencil line as a guide to where you will want the mouth. Then stitch the mouth using the back stitch. After you are done stitching the mouth, cut out the cheeks from pink felt. These will be stitched on using a French knot. Again, see photo A.
homemade halloween decorations
Step 2:
Trace and cut out 2 pumpkins from the provided template, using orange felt. Also cut out 2 leaves and 2 stems from green felt. Using the running stitch, stitch along the edge of the leaves. See photo B. Attach the stem to the pumpkin as you stitch along the top edge of the pumpkin, using the running stitch. Now continue to stitch along the edge and inner lines of the pumpkin. The stitches should be about 1/8” in from the edge. Again see photo B. Now attach the leaf to the pumpkin using the back stitch down the center of the leaf. Also stitch along the edge of the stem using the running stitch.
homemade halloween decorations
Trace and cut out the pumpkin face from black felt. Using the running stitch, attach the face to your pumpkin. See photo C. The yellow dots in the eyes were made using a French knot. Use the back stitch to add the vine to your pumpkin.
Step 3:
Trace and cut out 3 white candy corn tops, 3 orange middles, and 3 yellow bottoms. Place the white top piece on top of the orange middle piece with about 1/4” of overlap. Using the running stitch, stitch the white top to the middle with orange thread. Now using white thread, stitch the middle piece to the bottom piece. Now stitch the bottom piece with orange thread. See photo D.
homemade halloween decorations Step 4:
Sew a button onto the back of each pumpkin, ghost and candy corn. Sew it close to the top of the felt, using only the bottom 2 holes of the button. The top 2 holes will be used to attach the felt shape to the jute or string.
Step 5:
See our How to Make a Raffia Bow page to learn how to make these bows. Make 8 bows.

Step 6:
Cut about a 48" length of jute or string. Tie a loop at each end to hang it by. Then tie your garland pieces onto the string:
Start at one end with a raffia bow. Tie the bow on with about a 10" piece of raffia. Just wrap it around the bow's center and tie a knot in the back. The felt pieces will be tied on with a piece of embroidery thread anchored through the button. Your Halloween garland is now finished!
homemade halloween decorations
 
I found this one in 2010... very nice.
 

Monday, September 9, 2013

yarn ball wreath

Get the adorable look of a yarn ball wreath without wasting yarn. Instead, use your yarn scraps to make the cutest festive wreath ever. Depending on the colors of yarn used, your Scrappy Yarn Ball Wreath can work for any occasion. Give this darling decoration to your knit-loving grandma or your non-stop-crocheting friend as a sweet gift they'll cherish for years to come. It's a shame to waste any materials, so use your extra yarn and learn how to make a wreath that rocks.
 

Materials:
  • Aleene's® Quick Dry Tacky Glue™
  • STYROFOAM® brand foam - balls (10) - 3"
  • Toothpicks
  • Yarn, 1 skein each, lime, leaf green, turquoise
  • Fat quarter fabric, red
  • Ruler
  • Straight pins
  • Scissors
  • Iron
  • Knitting needles, 13” bamboo
     
Instructions:

  1. Wrap foam balls with yarn just to cover foam. Wrap desired amount with desired colors.
     
  2. Add a dab of Quick Dry Tacky Glue to end of yarn then press under yarn. Let dry.
     
  3. Lay finished balls on work surface and form into circle. Determine where one ball touches the next then apply a circle of glue to one ball. Immediately insert toothpick in center of glue circle then press to next ball pressing to secure. Continue gluing remainder of two ball sections.
     
  4. Glue sections together using same method forming wreath. Let dry.
     
  5. To create bow, cut 6” wide and 8” wide strips from lengthwise of fabric. Fold fabric, wrong side together, and overlap about 1” on sides and press. Apply a thin bead of glue along one edge then press other side in place forming a tube. Let dry. Repeat step with other strip.
     
  6. Place tube, right side down on work surface. Fold ends to center overlapping about 1”. Determine correct size for bow and trim ends if needed for desired size. Glue overlap in place. Cut a 4” piece from thinner tube, fold in half and glue edges together. Let dry. Cut a 12” length from thinner strip. Fold over ends at an angle and glue in place. Layer bow on top of strip and pinch together center. Wrap small section around center forming bow. Overlap ends about ½” then glue in place, holding with a pin if needed until dry.
     
  7. Place bow where desired on wreath then apply glue to back of center and press in place. If needed, hold with pins until dry.
     
  8. Insert knitting needles crossed under bow.
       

.

Hippie Chic Maxi Skirt

Show off your groovy side and create your own Hippie Chic Maxi Skirt. Easy skirt patterns are great for beginning sewers and this project will help you expand your skills. You can even create a fitted waistband for a more flattering fit and cool look.

Hippie Chic Mini Skirt
 
Materials:
  • Measuring tape
  • Wrapping paper or newspaper
  • Pencil
  • Yardstick
  • Scissors
  • 1-1/2 yards knit fabric-45 inches wide
  • Straight pins
  • Sewing machine
Instructions:
  1. Measure your waist. Add 2 inches and divide the total by 2. Note: Your true-waist is often not the waist where you wear clothing with a waistband. I tend to wear waistbands lower than my true-waist. When measuring your "waist", measure where you actually want the skirt waistband to be.

    Hippie Chic Maxi Skirt
     
  2. Trace a rectangle on wrapping paper or newspaper that is the waistband measurement by 12 inches. Cut out the rectangle. This is your waistband pattern.


  3. Measure from your waist measurement to the floor. Add 2 inches.
     
  4. Trace your skirt pattern on wrapping paper or newspaper. The top of the skirt is the waistband measurement, the bottom is 36 inches wide and the length of the skirt is the waist to floor measurement. Note: The pattern will resemble a triangle with the tip cut off. Cut out the pattern.
     
  5. Lay the both patterns on stretchy, knit fabric. Position the length of the skirt pattern and the 12-inch sides of the waistband pattern to run with the grain of the fabric. Pin the patterns to the fabric and cut out. You need to cut two skirt pieces and two waistbands.

    Hippie Chic Maxi Skirt
     
  6. Place the two skirt pieces together with the right sides facing each other. Pin the sides. Sew the pinned sides using a 1/4-inch seam allowance.
     
  7. Place the two waistbands together with the right sides facing each other. Pin the 12-inch sides. Sew the pinned sides using a zigzag stitch and a 1/4-inch seam allowance. The waistband is now a ring.


  8. Open the waistband into the ring shape. Fold the ring in half from one cut edge to the other with the wrong sides facing each other. Turn the skirt right side out. Place the folded ring over the top of the skirt
    with the raw edges of the waistband at the top. Pin the raw edges of the waistband to the waistband of the skirt. Sew the pinned edge using a zigzag stitch and a 1/4-inch seam allowance.
     
  9. Fold the waistband up. The construction of the maxi skirt is now finished.
     
  10. Put the skirt on. Fold half of the waistband down. With the help of a friend place a pin on the bottom of the skirt at the desired length. Remove the skirt and lay it flat. Cut the skirt at the pinned length measurement. No hemming is required. If a hem is desired, cut the skirt longer to accommodate folding and stitching the hem.

I found this on www.restyledjunk.com
  

Bev's Anthro Chained Lace Bib Knockoff


Ok – enough gushing. Ready for a tutorial??
I will warn you, this takes a little time. Like a few hours. Grab your stuff and sit in front of Harry Potter 7 Parts 1 & 2.
It’s not difficult – it just takes time to do some of the steps.
I promise when you’re done you’ll be so happy with the result that you won’t mind – plus you won’t have spent $468 on a necklace.
Hello.
Materials You’ll Need:
2 – 3 ring connectors (I found these in an earring findings kit)
Chain – 34″
3/8″ wide Velvet Ribbon – about 2 1/2 yards or so
1 1/2″ wide (or so) Lace – 16″
Jump rings – lots. You’ll need 6 mm and 8 mm.
Rhinestone Trim – 16″
Matching thread, needle
round-nosed pliers, wire cutters
Start by cutting your chain into 4 pieces – 8 1/2″ long.
Connect two chain pieces to the outside rings on the three ring connectors with jump rings.

Using your larger 8mm jump rings, connect the first links in the chains with a jump ring.

Continue connecting every other link in the chains with jump rings.

Repeat for the other chain pieces.
Cut 2 pieces of velvet ribbon, 9″ long each. Turn the ends under just a bit and sew them down so they don’t fray.
Cut 2 – 8 1/2″ lengths of rhinestone trim. Lining up the rhinestones with the top of the velvet, sew down the rhinestones with just a few stitches every so often.
This will help the trim lay flat against the velvet. You should have a little space at the end of the ribbon without rhinestones.

Insert the ribbon in through the center of the jump rings, between your two chains. This will take a little finagling. Just pull it through gently.
Bring the ribbon right up to the top of the center ring on the three-ring connector. Sew the ribbon to this little ring.

Your ribbon should now run through the center of your jump rings.

Repeat for the other chains/ribbon.
Cut two 8 1/2″ pieces of lace. Connect one piece of lace to the Left side of a chain group and a piece of lace to the Right Side of a chain group.
Use your smaller 6 mm jump rings and connect it to the outside links of the chain.
You could also hand sew this on if you are sick of jump rings. :)

Lay the two pieces out and overlap the ends of the ribbon that don’t have rhinestones. Make a “v” shape.
Sew together the ribbon ends.

Make a smallish bow out of velvet ribbon. Sew this over the section you just sewed together.

Cut two 25″ pieces of Ribbon. Add a larger jump ring to the top of each connector piece. Feed the ribbon through each ring and knot them just above the ring.

And that’s it!! That wasn’t too bad was it?


I just love the combination of materials. . .


Again I found this on www.flamingotoes.com . This lady has talent and makes this easy to understand and make...!!

Cocoa cup ornament

This little ornament is perfect to remind me of those cold – or not so cold – winter nights!!
Isn’t it cute? I was in Target the other day and saw these cute pj’s in the girls section that had a smiling mug of cocoa and two little cute marshmallows on the front. I thought the idea would be perfect for a fun little ornament!
Here’s what you’ll need to make your own:
Felt – blue, brown and white
Embroidery floss – matching colors
tiny bit of pink paint
thin batting
floral wire
Pattern – click here to download
Start by cutting out all your pieces out of felt.
Place the cocoa piece over the top mug piece, according to the placement on the pattern.
Sew the cocoa to the mug using a blanket stitch.
This is super easy and not scary at all. Start by bringing your needle up about 1/4″ below the edge of the brown felt.
Sew a little stitch about 1/4″ from the left of this one, putting the needle 1/4″ below the edge of the felt and bringing it out just above the felt. Make sure the needle passes over the loop of thread.
Repeat this last step again to start forming the blanket stitch.
Sew all the way around the cocoa piece until you come back to the beginning. For the last stitch, loop it through the first stitch to make the thread lay flat.
Sew the eyes and mouth onto this piece by using small stitches and following the pattern placement.
Fill the eyes in with long straight stitches.
Oh so cute!!
Cut out a layer of thin batting the same pattern as the mug and layer it between the mug front and back.
Sew together the mug pieces beginning with the inside of the mug handle. Use a blanket stitch, making sure the batting doesn’t show between.
Sew together the mug pieces around the outside edge of the mug using a blanket stitch.
Make faces on two of the marshmallow pieces according to the pattern placement. Use french knots for the eyes.
Dab a tiny bit of pink paint on to give them rosy cheeks. :)
Layer together a marshmallow front and back with a piece of batting between them. Start sewing them together with a blanket stitch about halfway down on the right side. Sew across the top and down the left side about halfway.
Place the marshmallow on top of the cocoa section of the mug.
Finish sewing the marshmallow closed, but for the rest of the way around, sew it to the mug as you go.
Repeat for the other Marshmallow.
To make the steam “curls”, wrap a piece of wire around a pen or something handy like that.
This is my Party Pictionary pen. Yes, this was what was handy.
You never know when you’re going to need to draw a random doodle so someone can guess what you drew.
Leave a bit of wire (about 3″) on the end straight. Clip the wire.
Feed the straight end of the wire down through the top of one of the marshmallows, between the felt pieces. Force it through the felt in the back just where the mug starts, then feed it into the mug pieces.
This will help it stay straight up. You can then bend and adjust the curl they way you want.
Repeat with the other marshmallow and another wire curl.
Make a loop with embroidery floss and sew it to the back of the ornament for hanging.
Admire your cute new little ornament!!
Doesn’t it just make you smile?
And want a mug of hot chocolate? :)
I hope you like it!!