Thursday, December 5, 2013

Peppermint Reindeer Chow

Easy to make. Plus the kids can really help with this one! My daughter even added red sprinkles, which apparently help the glow of Rudolph's red nose, who knew?
To package it all up for the reindeer we poured it into little  paint cans from Target add I made fun little printable using, Maree Truelove's new Christmas clip art. These would make a fun treat for teachers, party favors, school parties, or just to set out on Christmas eve!

Click here to download some tags of your own!


Here's what your going to need:
5 cups Corn Chex
1 bag Andes peppermint crunch baking chips
2 cups powdered sugar
3 TBS crushed peppermint sticks (optional)
Red sprinkles (optional)


Step 1: Pour powdered sugar into a gallon ziplock bag. Then add in your crushed peppermint and sprinkles if you would like. The sprinkles aren't necessary at all...but here we were improving the brightness of Rudolf's nose :). Just a little fun touch if your making with the kids!


2. Now melt your baking chips. I used my chocolate melter of course, here's more info on melting chocolate if you need it.


Step 3: Once melted, pour of chef mix in a large mixing bowl.


Step 4: Then gently stir. Don't use to much pressure or you'll smash your reindeer food to pieces! 


Step 5: Pour about half of your chex mix into the bag, make sure it's sealed really well, then shake, shake, shake! The kids love doing this part! 


Step 6: Use a slotted spoon to scoop on the covered mix and place into a second mixing bowl. Then repeat the process with the other half of the chex mix.


My daughter added just a few more sprinkles for good measure.


And the best part is...you don't have to share this with the kids! It is after all for the reindeer :)!


With Sprinkles.
 
 
I found this here:
http://makebakecelebrate.blogspot.com/2012/12/peppermint-reindeer-chow-with-free.html


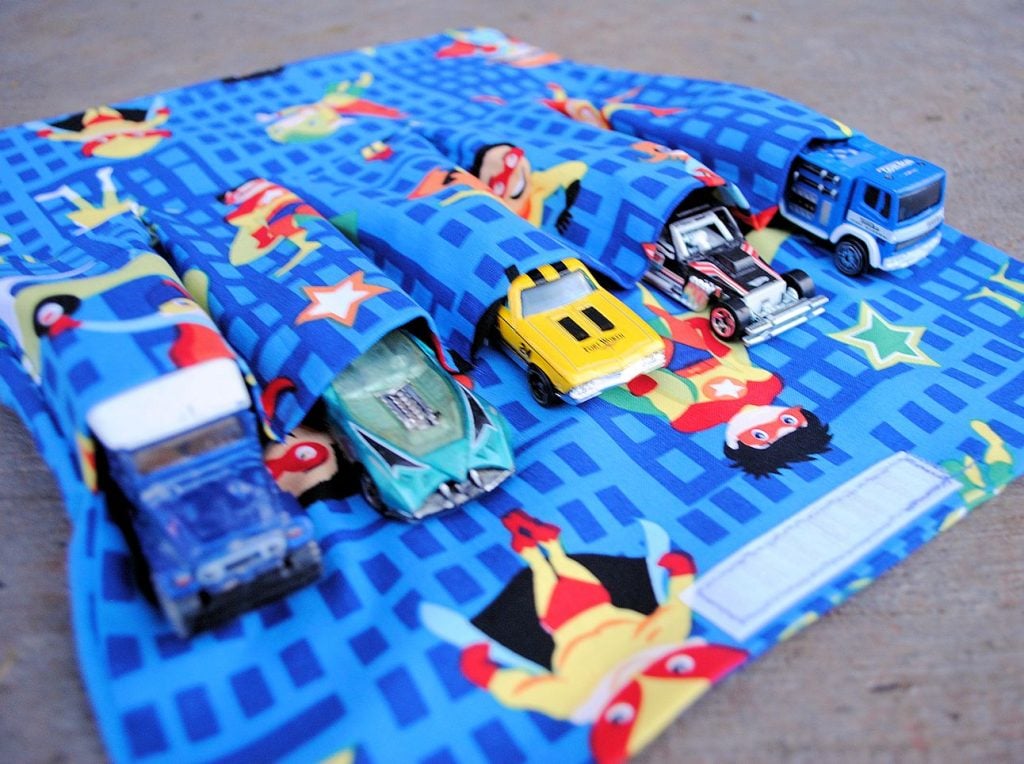
Kids Car Carrier Tutorial:

Car Wallet

Supplies:
About 1/2 yard of kid friendly fabric
Thread
Cars to go in it

First of all you are going to cut out 2 pieces of fabric that are 11 inches across and 14 inches long. I round out the corners  a little.
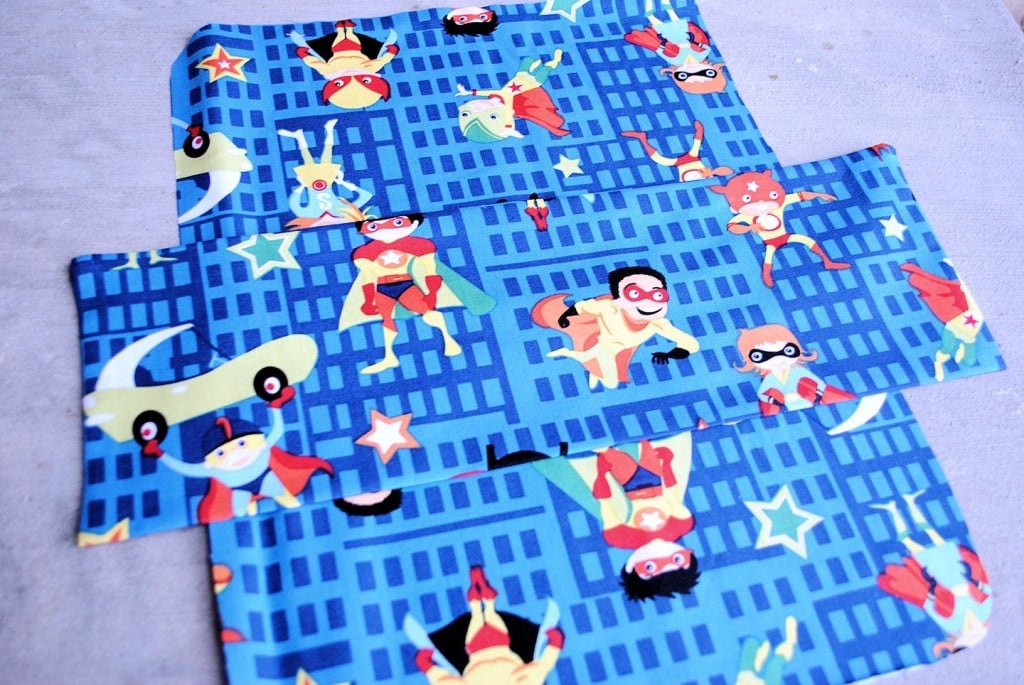
You’ll also need to cut one piece that is about 8 inches by 20 inches. Fold the top of this last piece down to meet the bottom with right sides together and sew around it leaving a small opening to turn it right side out. Turn it right side out, press it flat and sew your opening closed. It should look like this now when you lay it on top of your 11 x 14 inch piece:

Grab 1 of your 11 x 14 inch pieces and lay your rectangular piece in the center of it (like shown above).
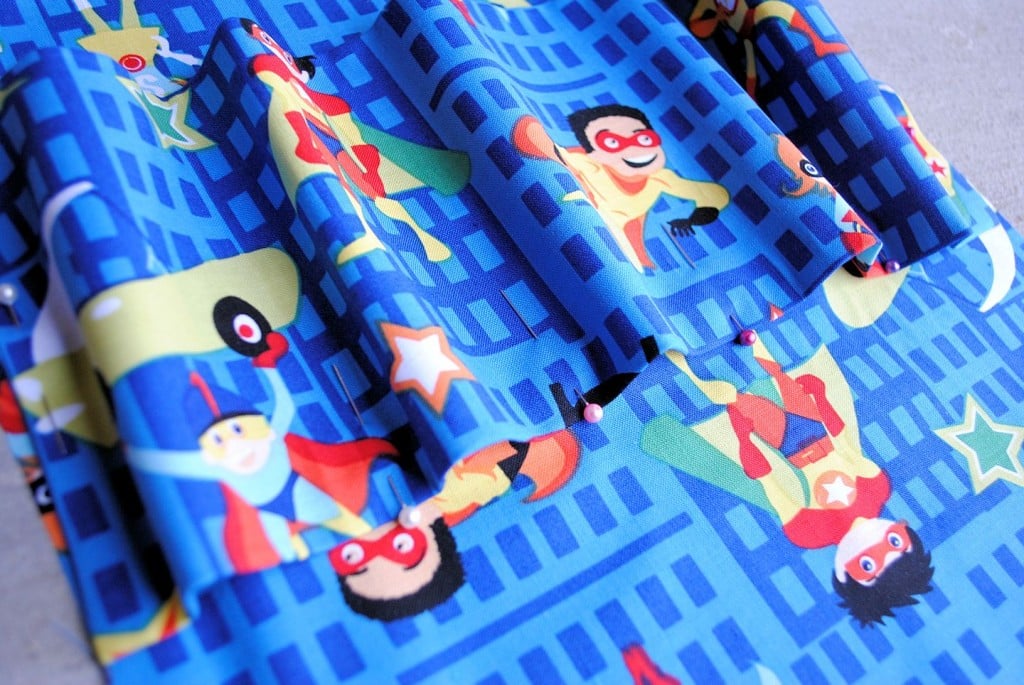
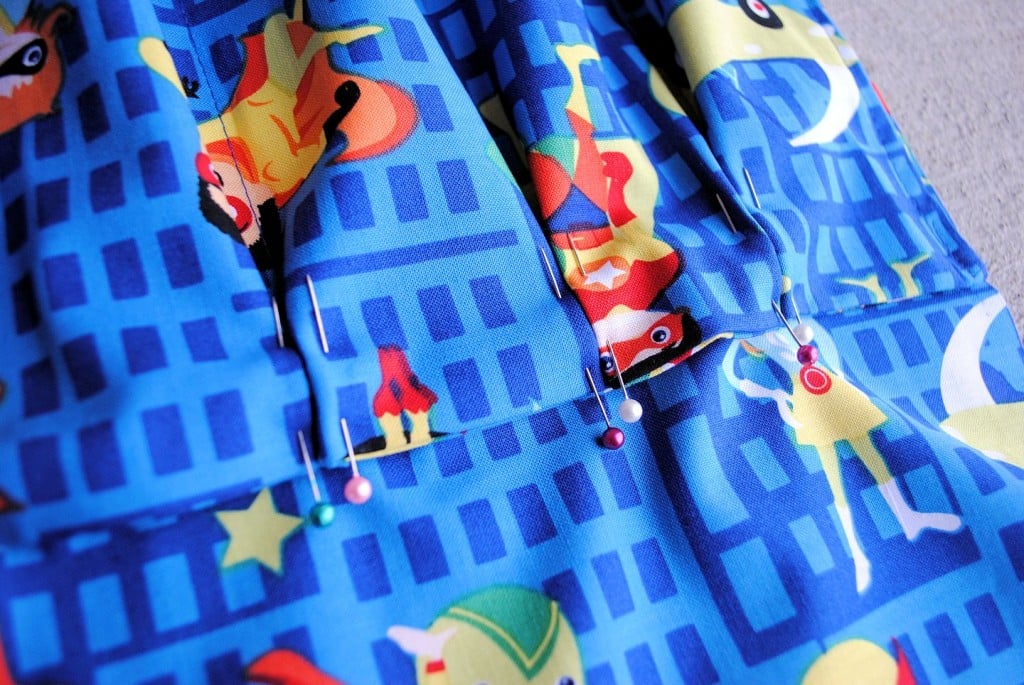
Pull the edge of your rectangular piece in and pin it along the edge of the 11 x 14 inch piece. Do this to the other side as well. Then pin the piece in across it evenly in 4 spots to form little pockets like this:

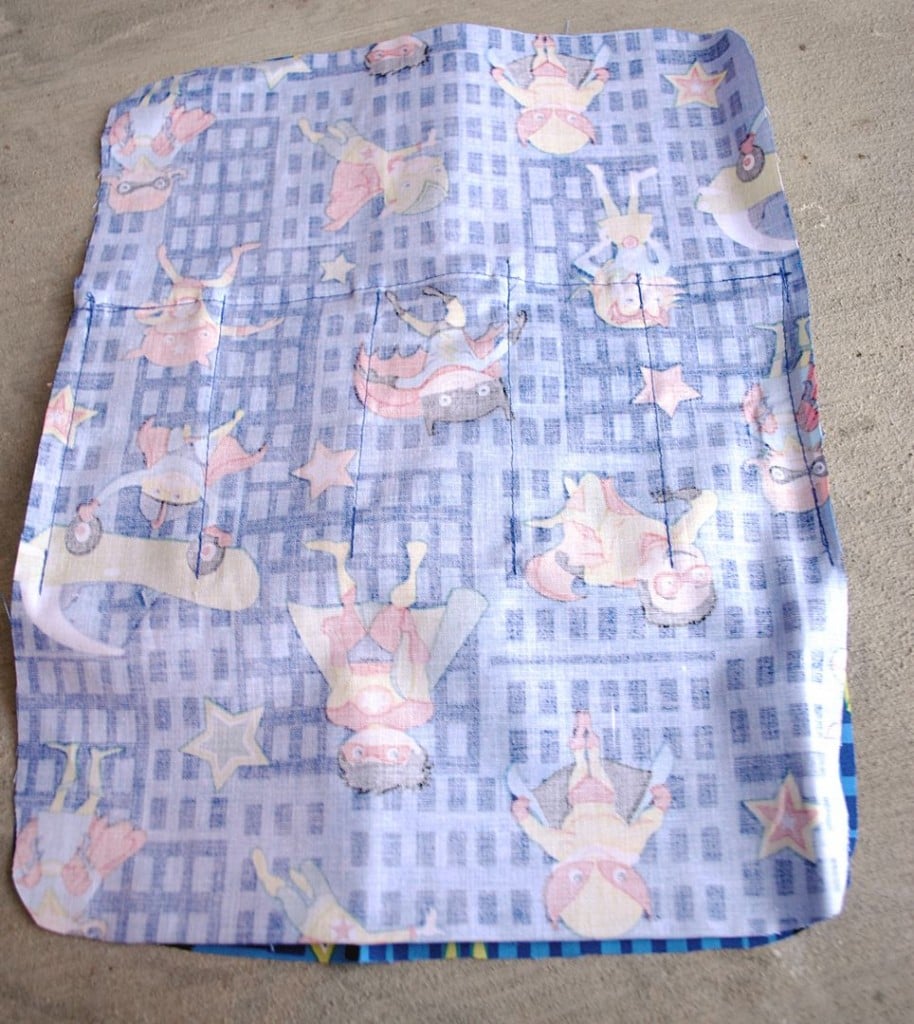
Sew a straight line in each of the spots where you just put a pin:

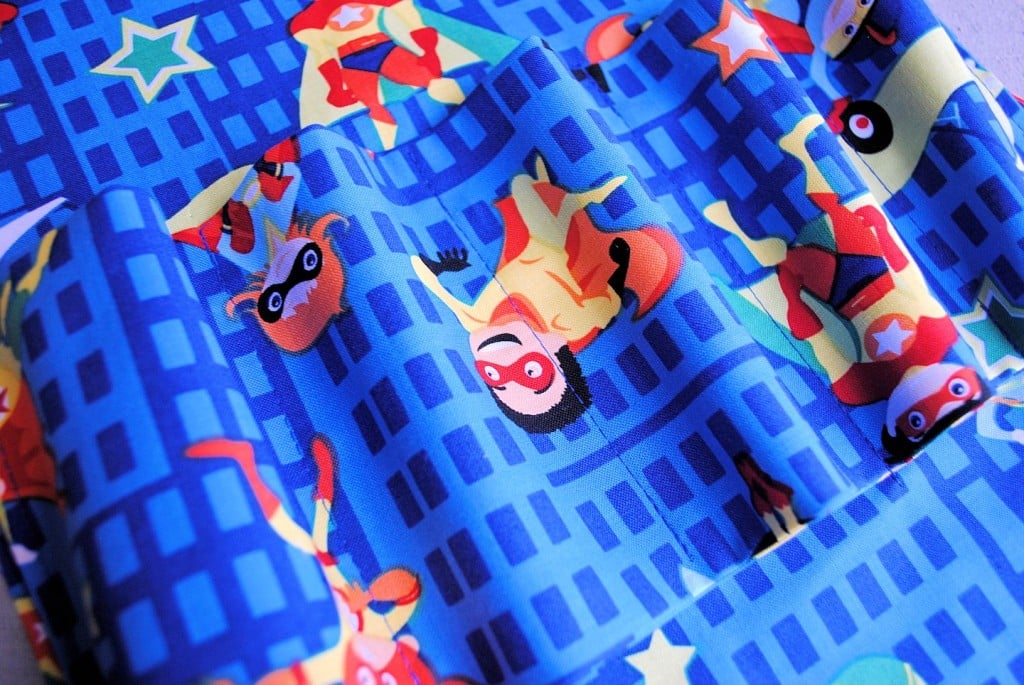
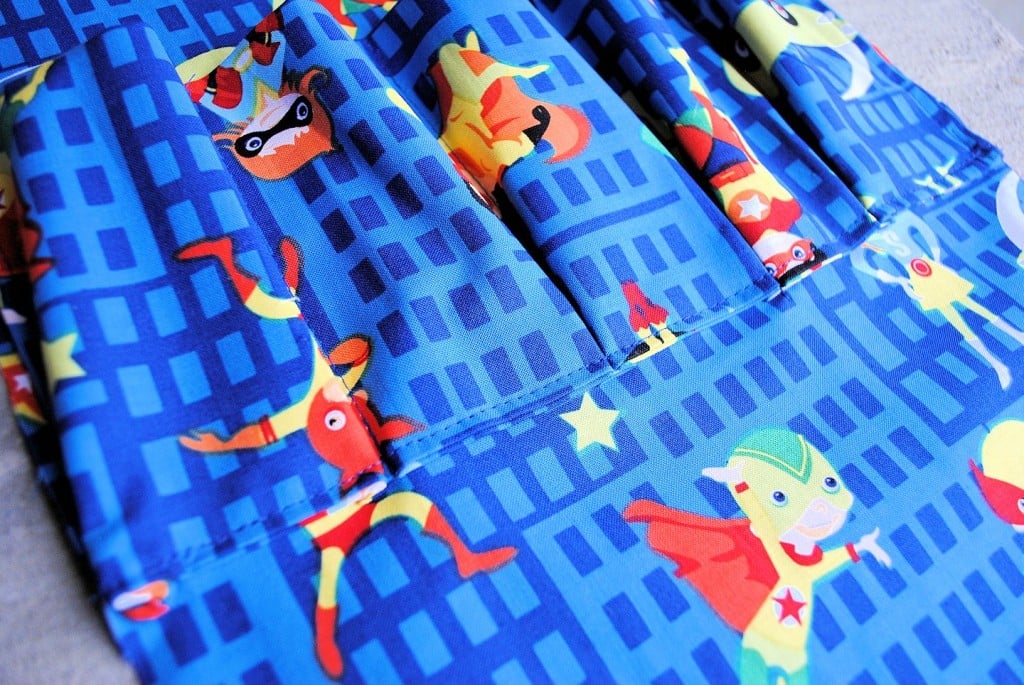
Next, you need to form little pleats at the bottom of these little pockets you just made. You are going to fold the bottom edges out so that they meet the next pocket over and lay smoothly along the bottom.

Then stitch a straight line across the bottom so that it looks like this when you are done:

Now, grab your other piece of 11 x 14 fabric and put right sides together and stitch all the way around leaving just a small opening (about 2-3 inches) at the top to turn it right side out.

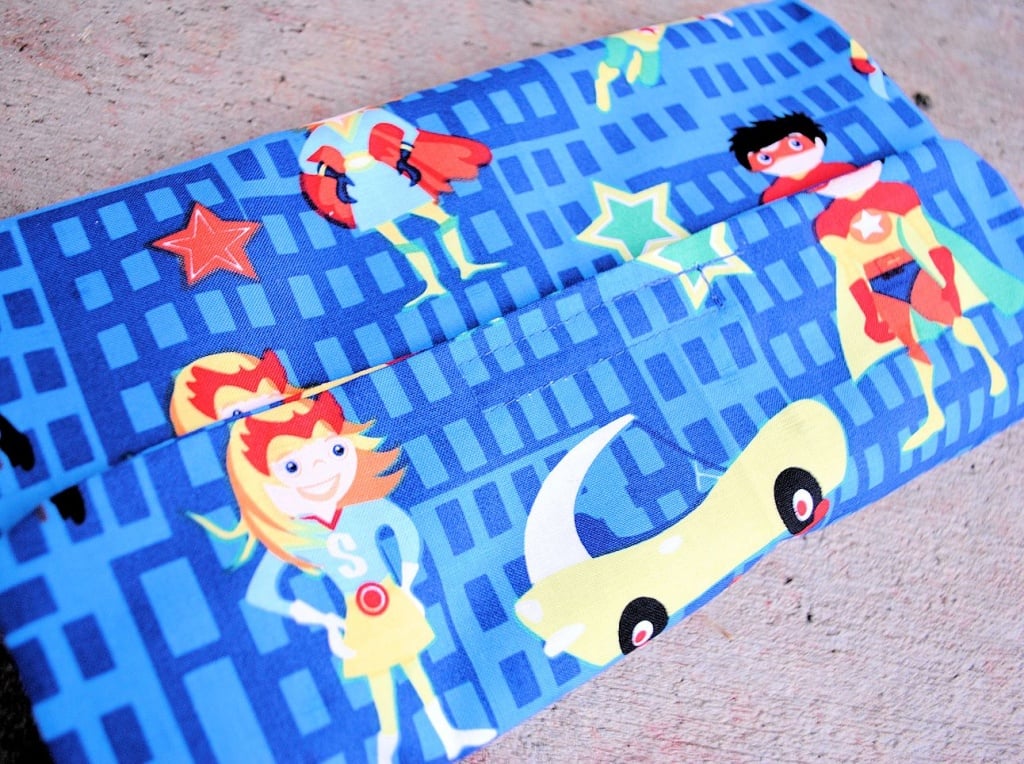
Turn it right side out, press it nice and flat and then add a piece of velcro to the top on the inside of the carrier (the part that has the car pockets) and on the bottom on the backside (the side that does not have the pockets) so that they meet up like this:

Candy Train Ornament


What You Need:
  • 1 roll of Life Savers
  • 1 small package of gum
  • 4 round peppermint candies
  • 1 Hershey's Kiss
  • 1 Rolo candy
  • 1 mini chocolate bar
  • Hot glue gun
  • Ribbons, yarn, string, etc. for hanging (optional)
How to Make It:
  1. Glue the gum pack to the center of the Life Saver roll. This is the bottom of the train engine.
  2. On the top of the train engine, glue the Rolo candy to the end of the Life Saver roll. This serves as the engineer's cab.
  3. Glue the mini chocolate bar to the top of the Rolo candy to make the roof of the cab.
  4. Glue the Hershey's Kiss upside down to the other end of the train engine top to make the smokestack.
  5. Finally glue four peppermints to the sides of the gum pack to create wheels.
Your train engine is done! You can attach a piece of ribbon to make your train engine into a Christmas ornament. Or you can forget the string and just have a cool edible toy perfect for a stocking stuffer.
Another fun idea is to use other types of candies to make the train's railroad cars. The only limit to this fun edible craft is your imagination.


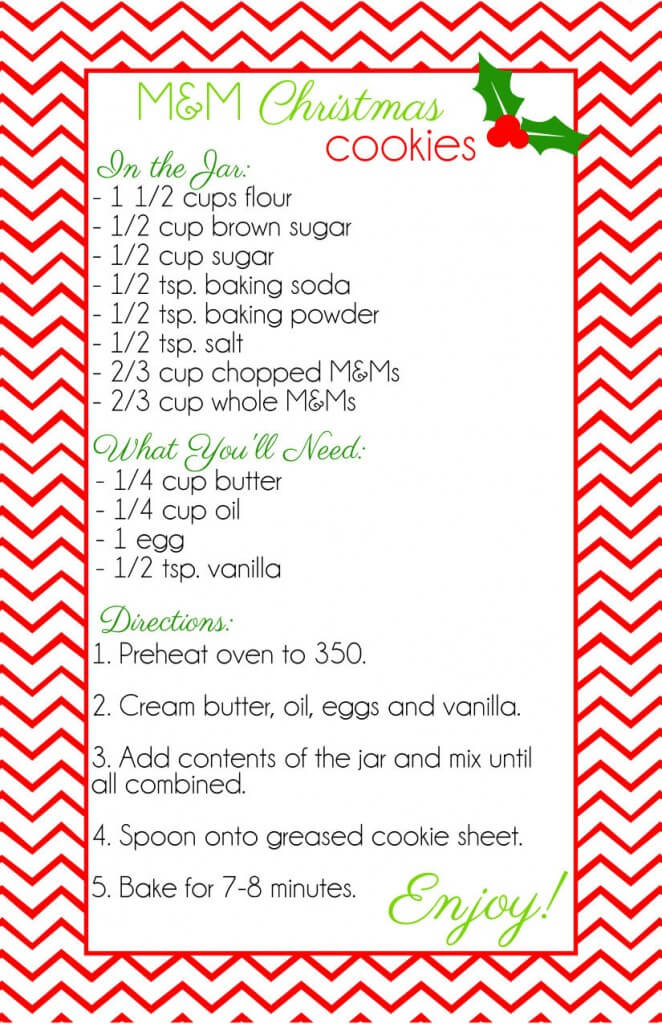
M&M Christmas Cookie

Christmas M&M Cookies Jar Tag and Recipe

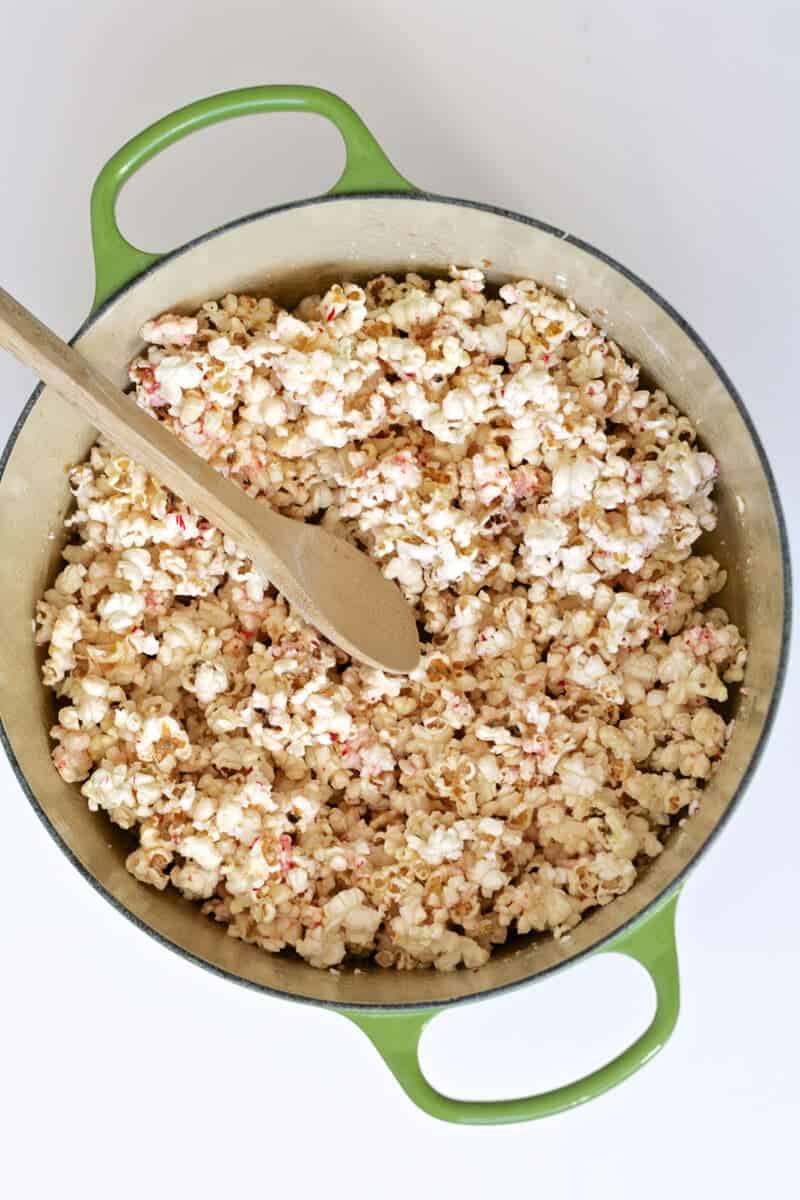
Candy Cane Popcorn

Candy Cane Popcorn
Candy Cane Popcorn
Ingredients
  • 2 sticks Butter
  • Half a Bag of Large Marshmallows (about 22)
  • 3 bags of Microwave Popcorn
  • 1/2 teaspoon Peppermint Extract
  • 4 Candy Canes, crushed
  • 1/4 teaspoon Salt
Instructions
  1. Begin by melting the butter and marshmallows together in a large pan. While the mixture is melting, get your popcorn popping (be sure to check out our Microwave Popcorn Trick!) Next crush up the candy canes -- the kids love to help with this part. By the way, if you don't have Peppermint Extract try making it with double the amount of candy canes.
  2. Once marshmallows are completely melted turn off the heat and add peppermint extract, candy canes and salt. Stir to combine then gradually add in the popped popcorn. Be sure not to let any unpopped kernels into the pot (nobody wants a chipped tooth!). Stir gently until popcorn is evenly coated. Eat warm or cool -- either way it's delicious.

Santa Pillow

This free sewing project shows you how to create an adorable Santa cushion. It is perfect for snuggling up next to whilst you sing Christmas carols or use it for a decoration or Christmas gift.

Christmas Santa Sewing Pattern

What you need

1/2 meter of white polar fleece and a small amount of red polar fleece.
A small amount of toy filling or wadding.
Scrap pieces of red / white / green / flesh and black felt.
White Pom Pom
Sewing supplies
Craft Glue

Instructions

Start by printing off the Santa Pillow Pattern.

Cut out 2 oval pieces in white fleece.  I cut mine 46 cm in length and 34 cm wide but you can make yours any size you like.
Cut the top off your oval.  Check the diagram in the pattern for directions. Cut out a strip in white for the hat band. Do this by measuring the top of your body (where the hat will sit) and double it in length and then make it approximately 12 cm wide . Set aside for later.
Cut out your felt pieces – use your diagram  for directions.
Stitch all your pieces together leaving out the mustache, this has to go on later. You can either hand sew or machine sew.
Once you have stitched the face pieces into place, you can stitch the face onto the body. Stitch the mustache into place so that the ends come over onto the body. Again, use the picture as a guide.
Now stitch the red top piece (hat) to the body – both front and back.
Making sure you have your pieces lined up stitch them together leaving a gap for filling .
Turn right side out and fill with toy fill. Make sure it is nice and firm. Now sew the gap closed.
Sew the two ends of you hat band together to make a circle. With the seam on the outside fold the ends in and make a tube. Stitch the long edge together.
This seam will be on the underside when stitched to the hat . Line it up so it covers the join of the hat and body .
I put holly leaves on my hat but it is entirely your choice.
That’s it – It’s easy. Have fun.

Found this on : www.craftbits.com

Snowman Cushion

This free sewing project shows you how to create an adorable Snowman cushion. It is perfect for snuggling up next to whilst you sing Christmas carols or use it for a decoration or Christmas gift.

Christmas Snowman Sewing Pattern

What you need

1/2 meter of polar fleece in white and a small amount of contrast for hat and scarf
Small amount of toy filling or wadding.
Orange and black felt (small pieces)
If you wish to decorate your hat with holly you will need scraps of red and black felt also
White Pom Pom
Sewing supplies
Craft Glue

Instructions

Start by printing off the snowman pattern.
Cut out a oval shape in white. I made mine 46 cm in length and 35cm wide.
Now cut out the hat in contrast , make it longer than needed so you can turn the bottom over to make a turn up edge. The scarf is made like a tube then turned right side out.  The ends are fringed by cutting strips .
Sew your body together leaving a gap down one side for turning right way out.
Once you have filled him ( make sure it is nice and firm) you can sew him closed.
Sew the hat and turn the bottom edge over to form a cuff for the beanie. Sit it onto the head and stitch into place.
Make your scarf and then stitch into place.
Now cut your pieces out for the buttons eyes and nose using the pattern. The nose is a small cone shape filled with toy filling to make it stick out.  It is stitched to the face section.
The buttons are circles cut out and stitched in place I have used white embroidery thread to make the cross on each one . The mouth is just a thin strip of black felt stitched into place.
If you want to engage your child in the project the finishing off decorations can be glued on to create the character.
Don’t forget the Pom Pom.
That’s it – finished. Have a nice Christmas!

Found this on : www.craftbits.com